Typescript with BullMQ sandboxes in NodeJS

Writing code using Typescript and BullMQ is quite straightforward most of the time since BullMQ itself is written in Typescript.
However there is a special case that has kept people scratching their heads unnecessarily and that is when you want to use sandboxed workers, i.e. a worker that is run in a separated NodeJS process. In this blog post I would like to offer an example with some scaffolding to easily accomplish this. It is by no means the only possible way to do it, but it is one way that works well in most cases.
Source code
The source code for this blog post is available here. Feel free to fork or copy the repo if you want to use it as a blueprint for new projects. And here the documentation for sandboxed processors.
ESM or CommonJS
Before writing this post (in mid 2022), I spent a lot of time trying to port a medium sized project to a pure ESM setup with Typescript. The amount of problems I got down this path made me reconsider and finally I found a sweet spot which is, use ES6 import syntax within Typescript but configure the compiler to generate CommonJS modules. This happens to work quite well, although it would be of course more elegant to use the new ES6 modules all the way. Maybe in the future it would be easier but for now I recommend this setup when working with Typescript in the NodeJS ecosystem.
Project structure
We will create a typical structure for a Typescript application in NodeJS, that is providing a package.json with scripts for building, running in dev mode as well as running tests. We will also provide a suitable tsconfig.json file.
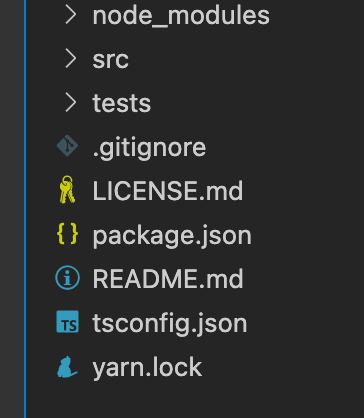
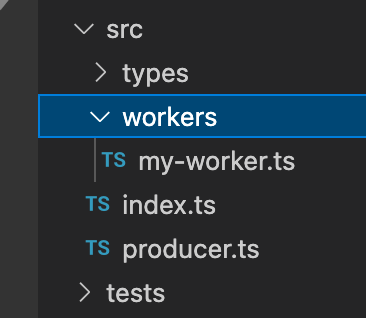
Inside the src directory we will put all the code for our application, including the workers. Note that for large apps you may want to move the worker code to a separate repository, away from the main application logic.
Worker
For this example we will just have a dummy worker that doesn't do anything:
import { Job } from "bullmq";

/**
 * Dummy worker
 *
 * This worker is responsible for doing something useful.
 *
 */
export default async function (job: Job) {
  await job.log("Start processing job");
  console.log("Doing something useful...", job.id, job.data);
}
As the worker is going to be used as a sandboxed worker we just implement the "process" function and export it as the default export.
The worker is then instantiated in a different file, in our case it would be on the index.ts. For this example we will just use concurrency 1 so we leave all the options to their defaults:
const myQueue = new Worker(queueName, `${__dirname}/workers/my-worker.js`, {
  connection,
});
Note that we do not specify the original ".ts" file, but the compiled ".js" file instead which will be built along the rest of the source code. This may look a bit awkward but it does not have any major drawbacks.
Producer
For this dummy example provide also a "producer" that adds some jobs to the queue so that the worker can process them. The code is very simple and we can just add a bunch of jobs like this:
import { Queue } from "bullmq";
import { queueName } from "./types";

const connection = {
  host: "localhost",
  port: 6379,
};

const myQueue = new Queue(queueName, { connection });

async function addJobs() {
  console.log("Adding jobs...");
  for (let i = 0; i < 10; i++) {
    await myQueue.add("my-job", { foo: "bar" });
  }
  console.log("Done");
  await myQueue.close();
}

addJobs();
Again, this code is very simple for illustration purposes, in production you normally will add the jobs in parallel instead of "awaiting" in sequence as the example above.
Development
During development it is very convenient to have a watcher configured so that as soon as we modify any source code file the new code is run automatically. For this I like to use the simplest possible tool that gets the job done, and in this case it is tsc-watch. The thing I like most about it is that you will run the same code in development as you would on production, so there will be no surprises there, the only difference would be that in production we will just run the code without the watcher.
We just provide the following scripts to package.json:
 "scripts": {
    "start": "node './dist/index.js'",
    "dev": "tsc-watch --onSuccess \"node ./dist/index.js\""
}When you are developing with workers, keep in mind that an application reload will most likely kill your current workers so jobs may get stalled, and eventually the jobs will end failing if this happens several times.
Testing
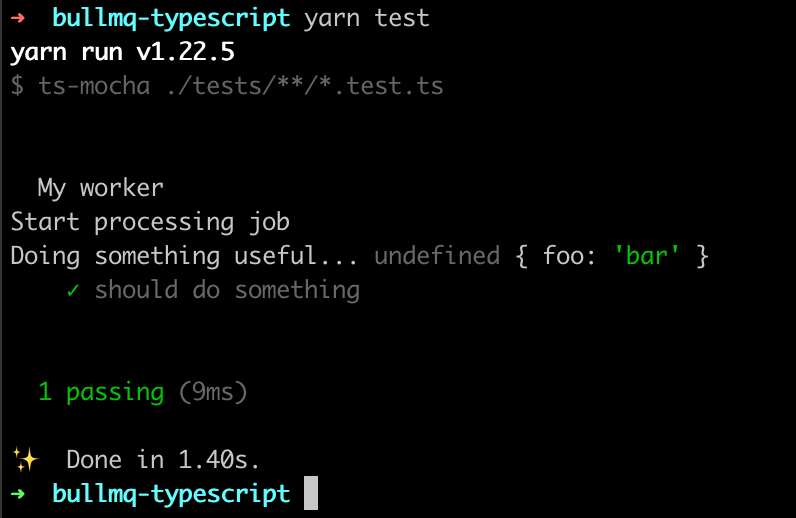
It is easy to write tests in typescript and import the workers in order to write unit or integration tests. For this we will use "mocha" and specifically ts-mocha which works pretty well with Typescript. A simple test would look like this:
import { Job } from "bullmq";
import myWorker from "../src/workers/my-worker";
import { describe, it } from "mocha";

describe("My worker", () => {
  it("should do something", async () => {
    const job = {
      data: {
        foo: "bar",
      },
      async log(msg: string) {
        console.log(msg);
        return 0;
      },
    };

    await myWorker(<Job>job);
  });
});
And we can add a run script to package.json like this:
  "scripts": {
    "test": "ts-mocha ./tests/**/*.test.ts"
}And run it using yarn:
Production
For production you will just run the built index.ts file in dist/index.js. The complete scripts section in package.json will look like this:
"scripts": {
    "build": "tsc",
    "start": "node './dist/index.js'",
    "dev": "tsc-watch --onSuccess \"node ./dist/index.js\"",
    "test": "ts-mocha ./tests/**/*.test.ts",
  }
Here the repo with the full example.
Follow me on twitter if you want to be the first to know when I publish new tutorials and tips for Bull/BullMQ.
And remember, subscribing to Taskforce.sh is the greatest way to help supporting future BullMQ development!